Dalam tutorial ini, saya akan menunjukkan cara untuk memperbaiki beberapa noise dari tembakan berkualitas rendah, dan saya akan menunjukkan kepada Anda cara yang sangat cepat dan mudah untuk memuluskan wajah seseorang. Wanita dalam tembakan ini bukan model, dan dia memiliki banyak karakter sehingga kita tidak ingin berlebihan dengan memperlancar. Kami akan membuatnya tampak nyata dan alami....
The Image
Anda bisa mendapatkan gambar yang kita gunakan dalam tutorial ini dari Free Range Stock sini. Teknik ini dapat diterapkan untuk kecantikan tembakan juga, Anda hanya harus menyesuaikan pengaturan pada beberapa langkah-langkah untuk mendapatkan efek yang lebih ekstrim pemulusan.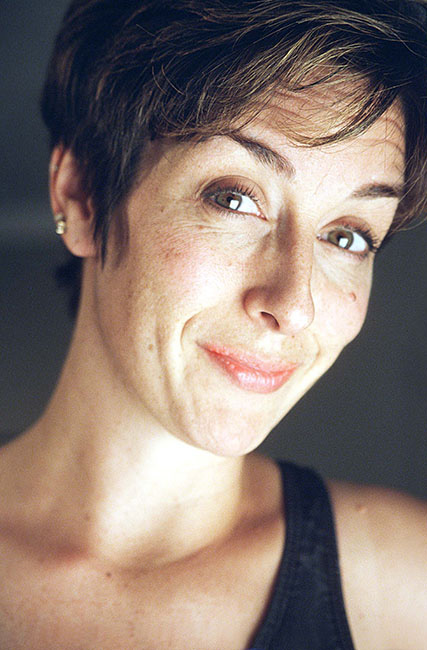
Step 1
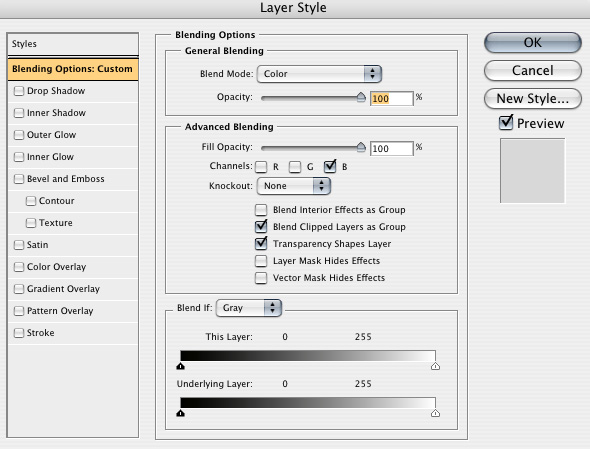
If you look at the blue channel, you will notice that it doesn’t look so good. There are a lot of JPG artifacts that you don’t really see when looking at the RGB composite, but it’s good to fix it for a variety of reasons. Importantly, it will reduce the color noise in the image and give us more flexibility when making corrections later down the line.Duplicate the Background layer. On the new layer go to Filter > Blur > Gaussian Blur. Enter 10 for the radius. Hit OK. Set the layer’s blending mode to color. Double-click on the layer to the right of the name to open the blending options. Under Advanced Blending, uncheck the R and the G. This makes the layer only affect the blue channel no matter what we do to it. Now go back and check out the blue channel. Looks better.
Step 2
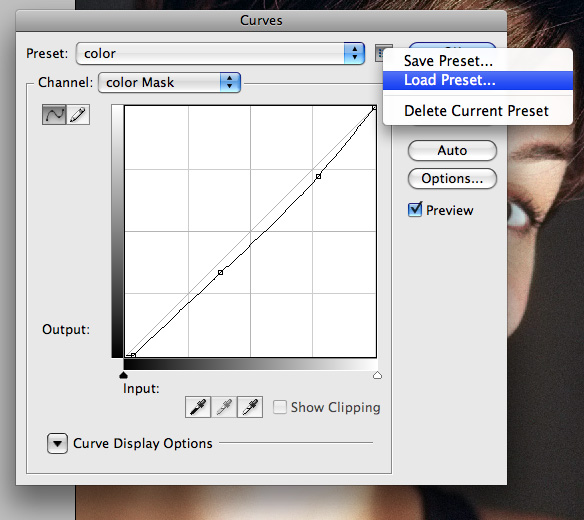
Now I will use Curves to balance the color in the image. I suggest using Curves over Levels for everything. Curves just gives you much more control.Download my curve preset to your hard drive.
Create a new Curves Adjustment layer at the top of the layers palette, then click the little button to the right of the Preset control, and select Load Preset and load the file.
Step 3
The technique that we are going to use to smooth out the face doesn’t require very much cloning at all. I do want to use the Healing Brush Tool (J) on any major freckles or blemishes, in this case her four large freckles.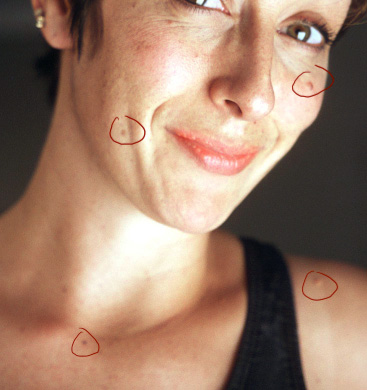
A good rule of thumb is to never modify your source image in any way. That is why we used the healing brush on a new layer. You never know when you might need to go back to where you started.
Step 4
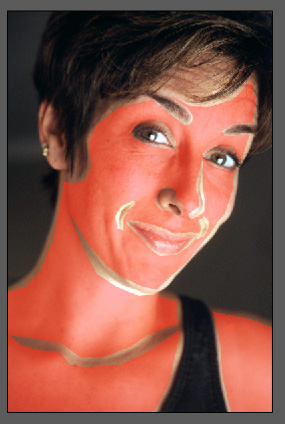
Select the three layers below the Curve layer. Drag them down to the New Layer button to duplicate them. Hit Command+E to merge the three duplicates.Select the Polygonal Lasso Tool and click around her face until all the skin is selected. It doesnt need to be too neat. Now go back, and while holding Alt, click around and deselect anything that is not skin like the eyes, eyebrows, lips, and nostrils. Go back once more and deselect any areas of detail that need to remain, like the edge of the nose, her dimples, her collar bones, and the edge of her chin. This is what my selection looks like as a quick mask:
Step 5
Go Filter > Blur > Gaussian Blur. Enter 20 for the Radius. Set the layer Opacity to 75%. Select and duplicate the same bottom three layers just like we did before. Hit Command+E to merge them. Put that layer just above the blurred layer. With the new layer selected, hit Command+Alt+G. This creates a clipping mask, which is indicated by the arrow pointing down on the layer. This means that the layer on top will use the bottom layer’s transparency as a mask.Step 6
With your new layer still selected, go to Filter > Other > High Pass. Enter 4 for the Radius.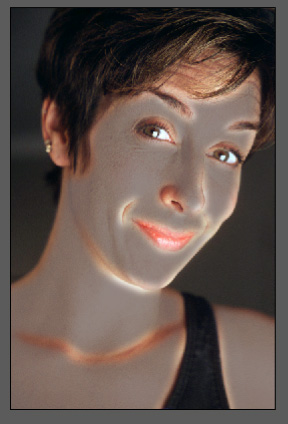
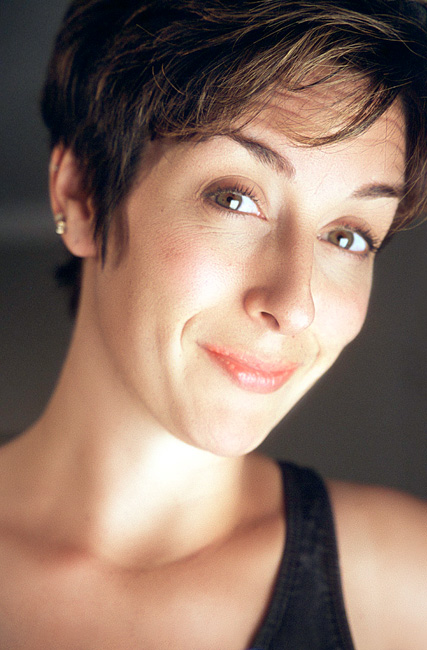
Rollover the image below to see the before / after…


0 komentar:
Posting Komentar
Silahkan Tinggalkan Pesan Setelah Bunyi..Bip..hehe